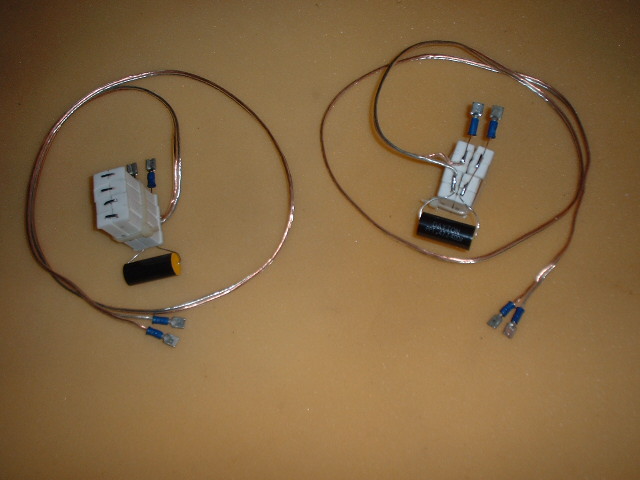
Here are some photos of the compensation networks used in speakers I've built. It shows how I make the cable assemblies for both the woofer and for the tweeter.Tweeter cable assembly, including compensation components R1, R2 and C1
The tweeter compensation components R1 and R2 are soldered together and physically arranged in a "block" which is then wire tied together. The capacitor C1, spade lugs and a couple feet of interconnect wire are then soldered to the resistor block to complete the tweeter cable assembly.
Woofer damper cable assembly, including compensation components R3 and C5
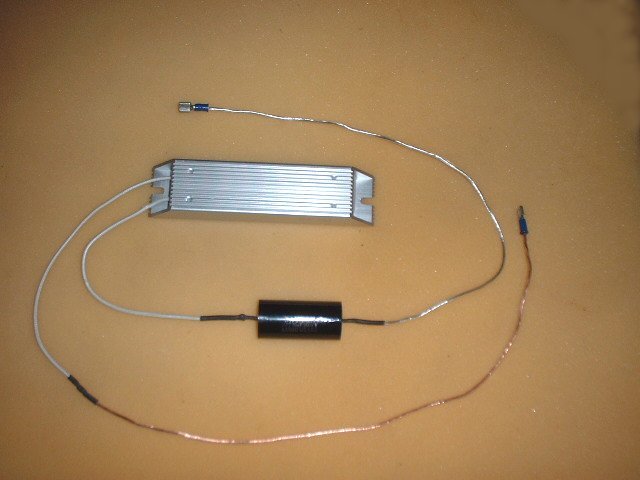
There are two woofer connections for those that include an RC damper (Zobel), and only one for those that do not (Pseudo Butterworth). In either case, the crossover PCB connects to the woofer using a straight interconnect with spade lugs on each end. There is no point in making a photo of a simple cable. But for those containing a Zobel, there is an additional connection to the RC damper cable assembly.
Resistor R3 of the woofer damper is mounted to the cabinet floor, just as the crossover PCB is. Capacitor C5 is laid on top of the fiberglass insulation where it cannot vibrate against any hard surface. Similarly, the resistors that form R1 and R2 (and capacitor C1) are laid over on the fiberglass insulation so that they cannot vibrate against the baffle or run against the crossover circuit board. The resistor block is actually supported by the rigid leads of the components soldered into the spade lugs, but this is a flexible support and the cable assembly will touch the fiberglass insulation which helps keep the heavy resistor block suspended away from the cabinet and crossover PCB.
Follow Ups: